This is a complete step-by-step guide on how to record electric guitar on PC.
There are three main ways to record e-guitar on your computer:
- Record sound from a guitar amplifier
- Record guitar by connecting guitar and audio interface via jack cable
- Connect a guitar to headphones input using jack adapter.
The main differences between them are the price of the equipment and recorded audio quality. All these methods can be a perfect way to record a guitar only if you know the purpose why are you recording.
I will cover all the details in the following points.
So let’s get right into it!
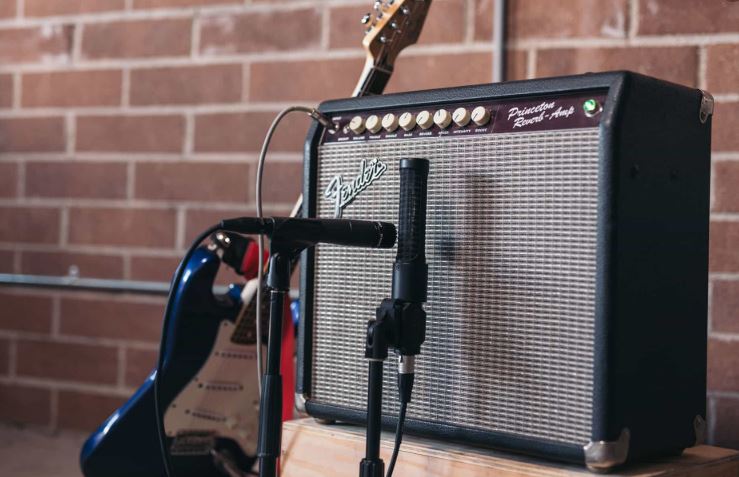
Studio way to record electric guitar on PC
Gear that you will need:
1. Microphone
A great choice would be Shure SM81-LC Cardioid Condenser Instrument Microphone.
2. Microphone stand in order to be able to record sound in a stable position
3. Guitar amplifier
If you don’t already know, guitar amplifier manipulates the electric signal strength from an electric guitar, bass guitar or acoustic one in order to translate it through speakers in the way you want to. In other words, they do the job responsible for shaping your guitar sound.
4. Audio interface
In this scenario, the audio interface will be used to connect only the microphone (not an electric guitar itself), due to the fact that we will record output sound of an amp.
5. Digital audio workstation
Find music software that fits your style. Most of them will do the work perfectly (Ableton Live, Cubase, FL Studio, Logic)
6. Cables
When you have your gear ready, let’s get to action steps:
- Connect audio interface to your computer through USB cable.
- Connect the mic to an audio interface to the input channel
- Make sure input volume is turned up (not too loud though)
- Turn on a guitar amplifier
- Connect your electric guitar output to the guitar amplifier input (with jack cable)
- Put a microphone in front of an amplifier
- Open your audio recording software
- Hit record and start playing!
In this way, you will record the best quality, solid, warm, natural and alive sound, that it is impossible to reproduce digitally.
It is a perfect fit for the final song recording
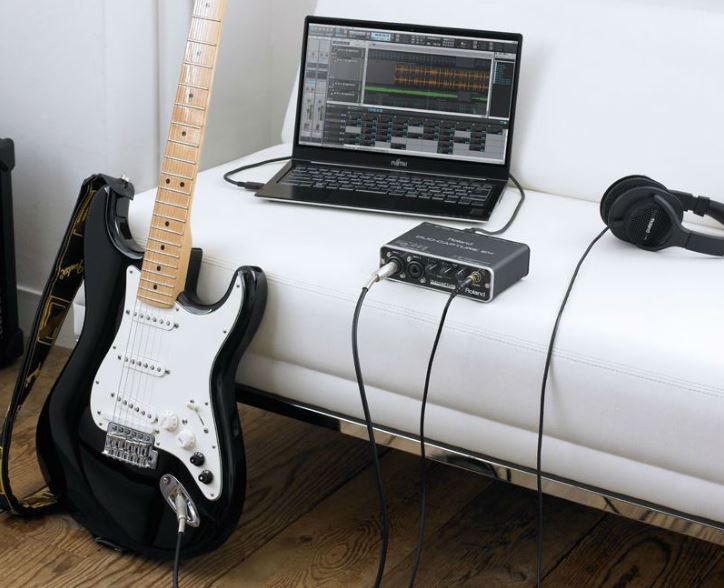
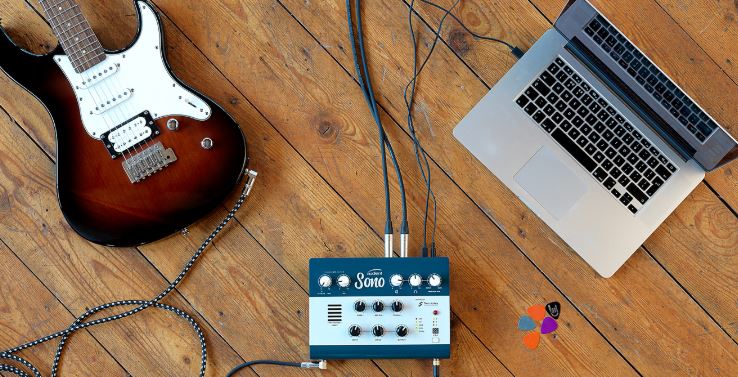
Digital way to record electric guitar on PC
1. Get an audio interface
In order to get your sound to the PC, your built-in sound card is not good enough for having a high-quality record. You will need an external professional audio interface to do the work. If you are a beginner, you can check cheaper options. This one is one of the most popular audio interface: Focusrite Scarlett Audio Interface. In this link, there are several options that provide different amounts of inputs(1 or 2) and the third option has MIDI input/output feature. So select one which suits your needs the best.
2. Get a jack cable
This is the most common cable used to connect the audio interface with electric guitar
3. Set up your audio interface
If you are a windows guy, you will probably need to install audio interface drivers to make it work. If you use mac OS, then probably you are already set up, the only thing you need to do is to plugin USB cable from audio interface to your PC (usually this cable is provided in the audio interface package).
4. Get a digital audio workstation
There are many options to choose from. If you are looking for free options, make sure to check out Audacity. If you are looking for professional software, that you would be able to make modifications and pro recordings of your song, then you should look up FL Studio Producer Edition. In case you want to be able to do a multitrack audio recording, then get an Ableton Live 10 Suite Multitrack Recording Software. This is costly, but it has a huge library of built-in sounds(70GB+), plugins, effects, that will save your money later on (you won’t need to spend money for additional plugins).
5. Connect your audio interface to your DAW
In some cases, it might not be connected automatically, so make sure to set it up. I can’t give you direct instructions since every DAW is different, but usually, it is in settings->audio-> select device (at least in FL studio this is the case).
6. Turn up input and output volume
In case you are not hearing, make sure to do so. Now you should be hearing the sound that you play through your speakers.
7. Press the record button.
That’s it! After recording the audio file should be saved into your DAW
The cheapest way to record electric guitar on PC

1. Get an Audio Jack Adapter
Now connect the jack cable that you use for an electric guitar with this audio jack adapter. And then plug it into your computer audio port.
And that is actually it. Now you should hear the direct sound from your speakers.
However, there are some drawbacks for this method:
- High latency (sound will be heard with a delay compared to actual playtime)
- Low-quality sound
How to add effects after recording guitar on PC
In order to make recorded sound modifications, we can do it in the mixer.
Guitar Rig is a great tool for that. It is considered as a gold standard among producers, and a lot of well-known artists use this in music production. Guitar Rig contains a lot of high-class amps, cabinet and effects. It has a free version as well, so make sure to check that out in this link.
Conclusion
So, these are the main ways to record electric guitar on PC.
Every method for recording electric guitar sound will vary in its price and quality.
If you are low on a budget, it is not a must to get professional studio setup right off the bat.
For demo purposes, it is always good enough to record it in average quality using our last method as an example. And when you are ready to get to the next level, it’s never too late to set up a solid recording studio equipment for professional guitar recording.
I hope this article was helpful. Have a great day and I wish you awesome recording sessions!
Thank you for your reading. Join the conversation by posting a comment.