
FL Studio makes it easy to record any instrument you want.
Before reading, make sure you have at least FL Studio Producer Edition version, which allows audio recording mode. ‘
How To Record Audio In FL Studio
1. Get a Microphone
In order to have a high-quality record, the right microphone is crucial. There are different types of microphones that are used for different instrument recording. Make sure to have a check before buying one.
2. Get an Audio Interface
Audio interface is an external device that can improve sound quality, performance and it can send audio signals from instruments which are connected to an external sound card inputs. So to make your microphone work, it has to be connected to an audio interface.
How to connect a microphone to an audio interface:
- Find an input channel on the audio interface and connect the microphone via cable, usually it is XLR cable.
- Connect audio interface to a computer via USB.
- Make sure all the audio interface drivers are installed.
3. Set FL Studio Audio Settings
Press F10 to open settings. Then navigate to Audio section and select ASIO sound card driver.
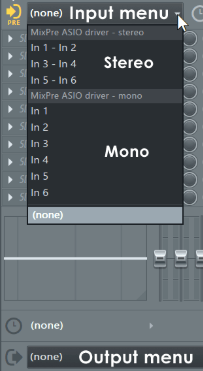
4. Select audio input in the mixer.
This photo is taken from official documentation on audio recording in FL studio
Open a mixer and choose a channel that you will record your instrument in. Then in the top right corner select the audio input you want to record. After you complete it, there should be a sound signal going to the FL mixer.
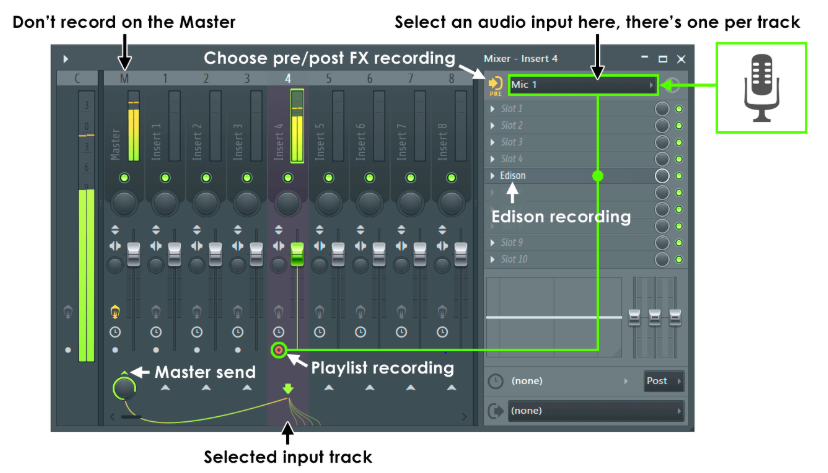
5. Set channel to recording mode
Click on the dot at the bottom of the channel(seen as a red dot in the picture). It means that this is the only channel that we will be recording during the session.
6. Start Recording!
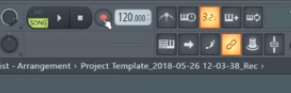
Press on this red button in the top section and you should see a popup
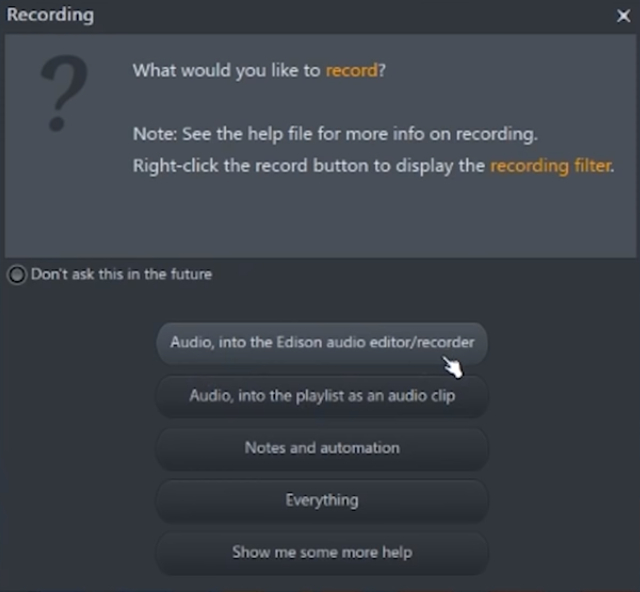
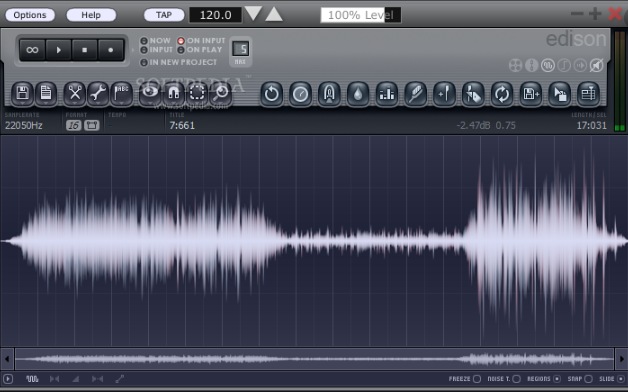
‘Audio, into the Edison audio editor/recorder’ means that it will save your recording into edison plugin.
‘Audio, into the playlist as an audio clip’ mode will record straight to your playlist in one audio file.

7. Stop recording.
Click the same button that started recording.
And voila, we have a record! Well, it might not sound perfect at this moment and probably some tweaking will be necessary, but our main goal is achieved.
What if you want to record only a MIDI instrument?
In this case, we will have to do the following:
- Connect your MIDI instrument to a computer with USB.
- In the menu bar click Options -> Midi settings.
- Select a port in which you would like to play your instrument in.
- Go to instrument rack and import Midi Out plugin
- Match the port we have selected previously and select the channel that your MIDI is connected to.
Tips n Tricks to make your record sound studio quality
- Silence and acoustic foam
When you are recording a sound, make sure that there are no external noises around you. For a professional sound, it is a necessity to have an acoustic foam that will absorb all the reverb. Your recorded sound has to be as clean as possible, due to the fact that all the external noises, reverbs in a room can make your sound not pure and it can be harder to mix it in the track.
- No pre-effects
If you want to spice up your sound or make it sound richer it is obvious that we might need to make some tweaking with additional effects. But make sure that we do not use them while recording it since it might be impossible to modify the recorded sound in a different way later on.
- Manage optimal input sound level
Before making recording takes, make sure to check out if your sound level is not too low or not too high. If it is too low, it might catch some external not necessary noises when compressing your sound later on. In case it is too loud, the sound quality will be distorted and this will be impossible to fix in the mix after the record is done. As a reference, it is good practise to aim around -18 dB.
FAQ
Why do I hear other track elements playing when I only try to record my one instrument?
When the track starts to play in record mode, you will hear all the tracks in your song even though we are recording only one single instrument. In order to avoid that, you can mute unnecessary tracks if it distracts you from recording the take.
Why does FL studio record my instrument only on one side?
The reason behind this is probably in the selection of audio input in the mixer and the technique you are recording. If you are using one input to record, you need to select mono input.
How to export my recorded audio file?
If audio has been recorded in Edison, you can just click CTRL + S and it will export it in WAV format. If you have recorded audio in a playlist and you want to export it as a separate file you can double click on your audio file, then on the new window which has opened right-click on audio wave. Then click save as and you will export it in WAV format as well.
Conclusion
Audio recording at the beginning might seem a bit overwhelming and costly.
And it actually is.
Most importantly, don’t get stuck in the beginning process.
Every new problem you will face might discourage you, but as you go along and keep growing, you will learn new things day by day and by some time you will become a great producer, that will be able to help other beginners to get through these first obstacles.
I hope I have helped a bit with this article by explaining what is necessary for you to start recording and I wish for you to have the best recording sessions ever!
Thank you for your reading. Join the conversation by posting a comment.